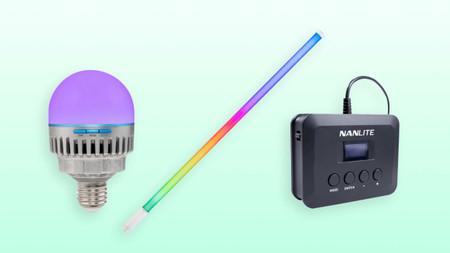
New Firmware Updates for PavoTube T8-7X, PavoBulb 10C, and Control Bank
Posted by Sam Mallery on Nov 18th 2023
We recently told you about the powerful new firmware for the Nanlite FC spotlights, and we already have more new firmware updates that are ready to go. This time it's for the popular PavoTube T8-7X, PavoBulb 10C, and the Control Bank (please note that the Control Bank is also referred to as the WC-USBC-C1).
Both the T8-7X and PavoBulb are compatible with the Control Bank, which has a few different roles: it acts as an external battery pack for these lights, it adds a screen and 3 control buttons—which gives you deep control over the parameters of the attached light without needing to take out a mobile device with the NANLINK app, and if you have multiple PavoBulbs or T8-7X tubes, you can adjust the settings you want on one light and then plug the Control Bank into all of the other lights to quickly share those settings.
The firmware for the Control Bank adds a new wireless DMX feature, and like the recent update to the FC lights, the new firmware for the T8-7X and PavoBulb adds the ability to update their firmware directly from the NANLINK mobile app. In the near future, you won't need to fuss with USB flash drives and website firmware downloads. However, you will need to do this for the current firmware update, and this blog post explains exactly what you need to do.

This post has separate instructions for each one, so scroll down to find your product. We recommend reading through the steps first before you execute the firmware updates, as the procedures are nuanced and it will save you time.
How to update the firmware of the Nanlite PavoTube T8-7X LED Tube Light
- Get a USB-C jump drive (also referred to as flash drives) and erase it so it's completely blank, and when you do this, reformat it to either FAT or FAT 32 (if possible).
- Download the firmware file and load it onto your USB-C drive (the link to download the firmware is provided below).
- With your PavoTube turned off, plug the drive into its USB-C port, and then long-press the MODE button to turn it on.
- When your T8-7X turns on, it will flash in blue. This means the light has recognized there is new firmware and it is waiting for you to confirm the update.
- While the T8-7X is flashing blue, long-press the DIM/CCT/HSI button. The light will only flash blue for 3 seconds, so this must be done quickly. The T8-7X will then flash in green for 3 seconds, which means the firmware has been updated successfully, and then it go into its normal operation mode.
- You are done!
Here's the link where you can download the PavoTube T8-7X firmware:
https://www.nanlite.com/service-productDetail?type...
How to update the firmware of the PavoBulb 10C LED Smart Bulb
- Get a USB-C jump drive (also referred to as flash drives) and erase it so it's completely blank, and when you do this, reformat it to either FAT or FAT 32 (if possible).
- Download the firmware file and load it onto your USB-C drive (the link to download the firmware is provided below).
- Screw PavoBulb into a regular lamp that's plugged into an AC outlet, or if you have the Nanlite E27 Magnetic Mount, plug it into an AC outlet (the power cable for this is sold separately) and screw PavoBulb into it.
- Plug your USB-C flash drive into the USB-C port on PavoBulb.
- Press and hold the MODE button for 3 seconds, PavoBulb will flash blue, which means it has recognized there is firmware and it's waiting for you to confirm the update.
- While PavoBulb is flashing blue, long-press the DIM/CCT/HSI button. It will only flash blue for 3 seconds, so this must be done quickly. PavoBulb will then flash in green for 3 seconds, which means the firmware has been updated successfully, and then it go into its normal operation mode.
- You are done!
Here's the link where you can download the PavoBulb 10C firmware:
https://www.nanlite.com/service-productDetail?type..
How to update the firmware of the Nanlite Control Bank WC-USBC-C1
- Get a USB-C jump drive (also referred to as flash drives) and erase it so it's completely blank, and when you do this, reformat it to either FAT or FAT 32 (if possible).
- Download the firmware file and load it onto your USB-C drive (the link to download the firmware is provided below).
- With your Control Bank turned off, plug the drive into its USB-C port, and then turn it on.
- When the screen says "FOUND FIRMWARE V1.01.01", press SWITCH button to select "UPDATE" then press the MODE button or the "+" button to start the firmware update.
- Then the screen will say "FIRMWARE UPDATING" and afterward it will say "FIRMWARE UPDATED" and return to normal operation mode.
- You are done!
Here's the link where you can download the Control Bank firmware:
https://www.nanlite.com/service-productDetail?type...
Thanks for checking out this blog post, we hope it has been helpful! If you need any more support for these updates, please contact us and we will respond to you as quickly as possible.

